Roof wiring · Step-by-step guide
Place and adjust Tesla MCIs
Let SDL place mid-circuit interrupters as you draw strings, then adjust individual locations when needed.
Before you start
- A self-designed project with roof faces and panels already placed.
- Your panels, supported Tesla inverter or Powerwall DC input, and compatible module-level device selected in Equipment. This example uses Powerwall 3 and Tesla MCI-2.
- The project’s site conditions loaded so SDL can check the string limits.
1. Connect your panels into a string
Open Roof layout, then Wiring. An MCI is a Tesla mid-circuit interrupter; SDL calculates its locations from the selected equipment and string layout.
- Choose Draw string and click the panels in connection order. Press Enter to finish.
- Select the circuit in the right-hand list. Check its Inverter / MPPT input and the displayed panel limit.
- Look for MCI layout and the purple device markers. Placement is automatic; there is no separate apply-MCI button.
Already have strings? Select one and continue below. Resolve any string-limit warning before treating its MCI layout as ready.
2. Find the automatic locations
With a string selected, scroll the right-hand panel to MCI locations.
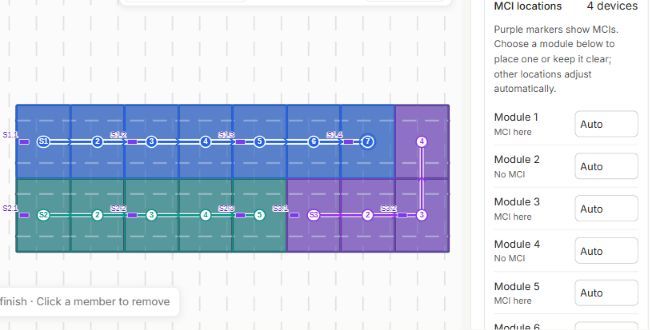
- Match the numbered modules in the list to the selected string on the roof.
- MCI here identifies a device location. No MCI means that module currently has none.
- Leave the choices on Auto unless you need to adjust a location.
This example has four devices on the selected string. Your count depends on your equipment and layout.
3. Adjust a location
Use the dropdown beside the module you want to change.
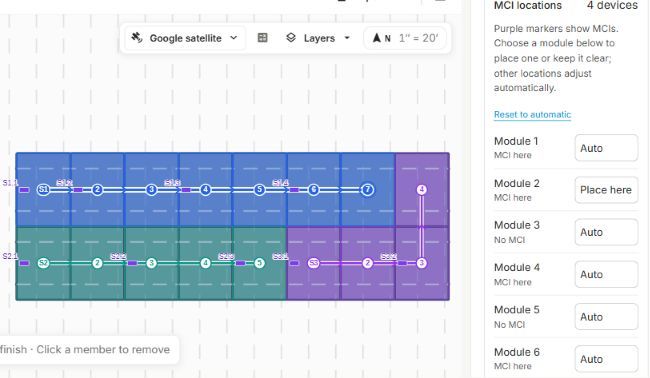
- Choose Place here to request an MCI at that module, or Keep clear to avoid that location.
- Watch the purple markers and device count update. SDL adjusts the other automatic locations around your choice.
- Check any warning that appears. A location preference does not override an equipment limit.
Here, placing an MCI at module 2 moved the remaining automatic locations and kept the count at four.
4. Return to automatic placement
You can change your mind without redrawing the string.
- Set an individual module back to Auto to remove only that preference.
- Choose Reset to automatic to clear the selected string’s location preferences.
- Use the toolbar’s Undo and Redo buttons to compare your latest change. Wait for Saved before leaving the project.