Equipment setup · Step-by-step guide
Place a Tesla gateway and inspect its terminals
Add Gateway 3 to your drawing and find the connection information before you wire it.
Before you start
- Open a self-designed project and choose Electrical.
- Use a practice project to try these steps.
1. Add the gateway
Choose a product from the library, then place it on the drawing.
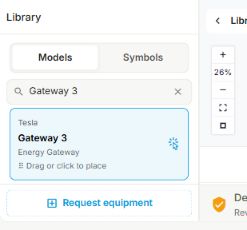
- Open Library and select Models.
- Search for Gateway 3. Click the Tesla Gateway 3 result, then click an empty area of the canvas.
- Press Esc to finish placing equipment.
2. Select a terminal in the preview
The small preview in the properties panel is interactive.
- Click the gateway body on the drawing to open its properties.
- Scroll the properties panel to Click to configure.
- Click Supply Terminals in the small gateway preview. The panel shows information for that connection.
3. Read the connection details
Expand Connection details below the selected terminal.
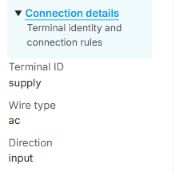
- Check the terminal identity, wire type and direction. For this supply terminal, the UI shows supply, ac and input.
- Read the connection notes below those fields before choosing where to wire.
This identifies the terminal; it does not verify a complete circuit. Use the exact model’s installation instructions to determine the wiring arrangement.